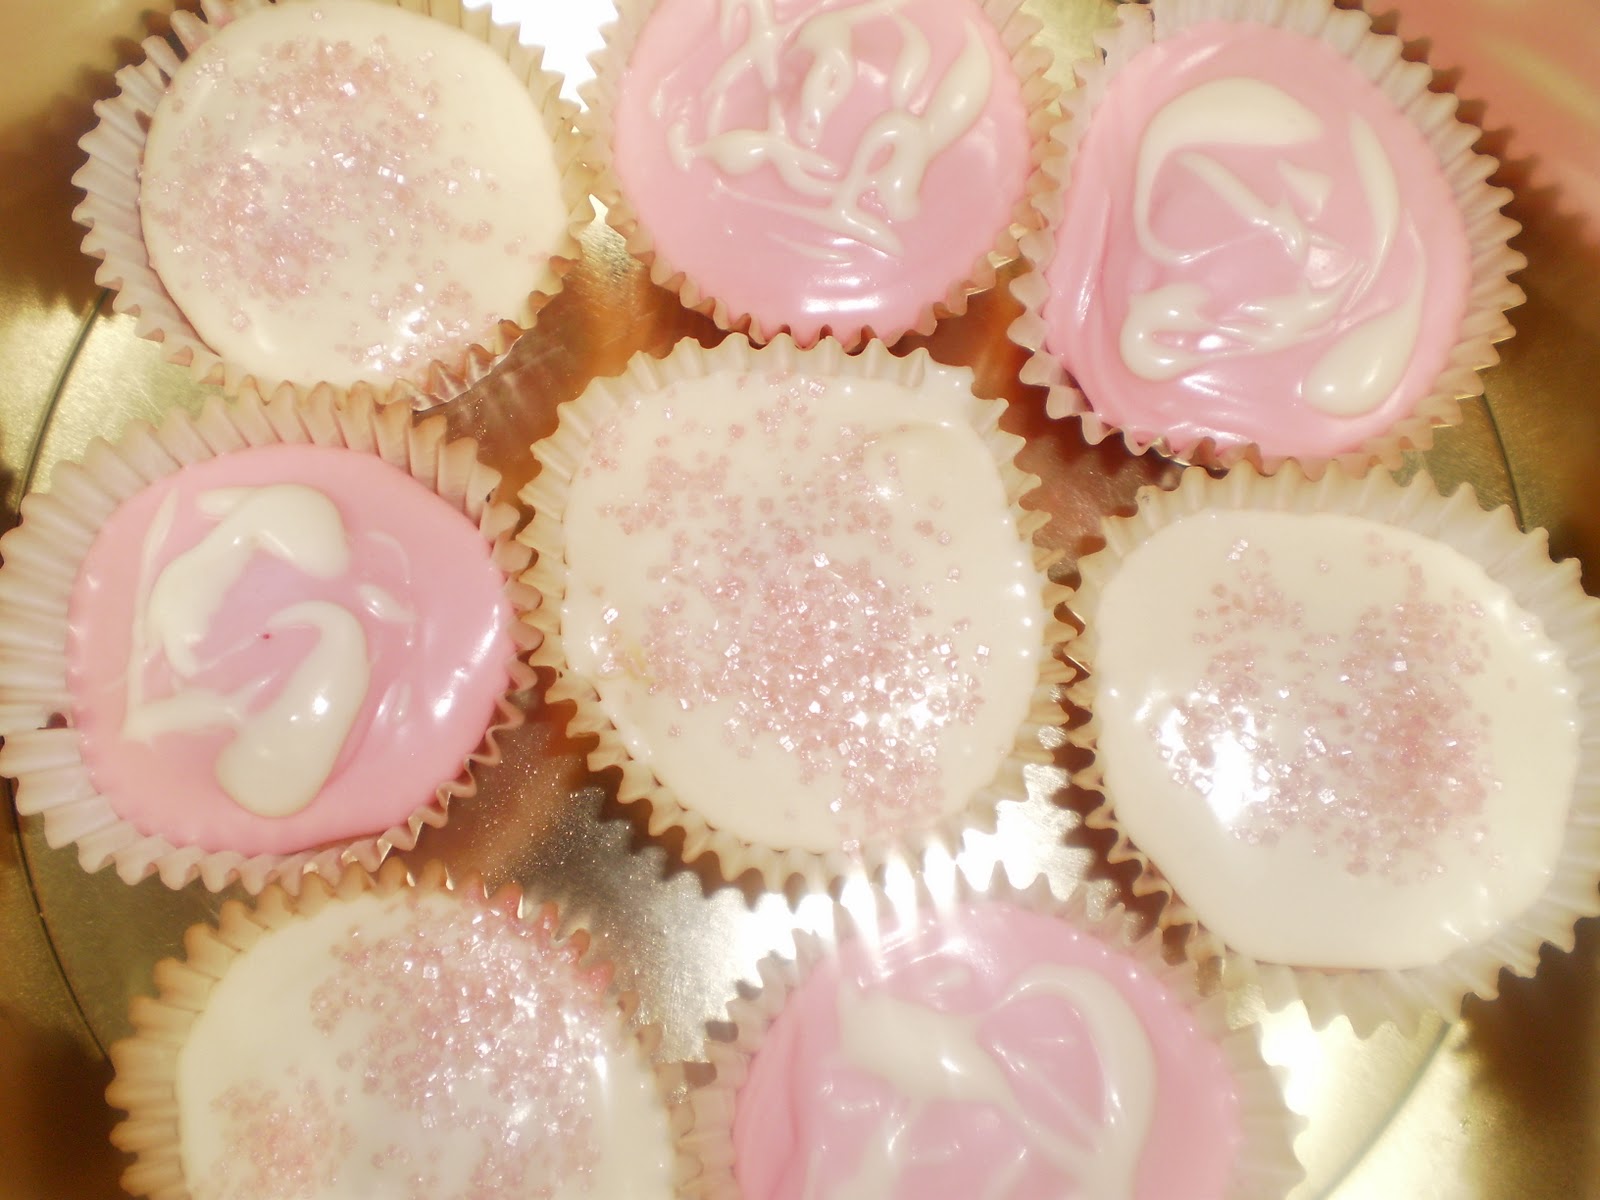
Showing posts with label Katie-boo's Cakes. Show all posts

Friday, 30 September 2011

Twice as Nice...1 ingredient, 2 ways. Edition 1: Pastry

Another new feature I've dragged out for the depths of my imagination (which, judging by my groundbreaking titles is more like a puddle than a never ending abyss of creativeness).
As you probably gathered from the highly innovative concept, each edition will feature one ingredient used two different ways. The two recipes featured here came about after I was sent the Dietary Specials new recipe Shortcrust Pastry.
I must preface this now by saying this is NOT a sponsored post, I just really love this product. In fact I'd go so far as to say its probably in my top three of favourite gluten-free products ever. Not only because it tastes great, but because it saves me from the colossal ball-ache of making pastry from scratch. Plus you can freeze it until you need it. AND you can roll it out without the whole lot falling apart and sticking to the rolling pin, making you want to throw yourself on the floor in a grown woman tantrum. In short, I am a slut for this pastry.
The first recipe is one that I created when trying desperately to think of something with strawberries in as my recipe that could be made for a Breast Cancer Care Strawberry Tea Party. I wanted something (other than the run of the mill cupcakes) that anyone hosting a party might fancy rustling up.
I don't like to blow my own trumpet, but this recipe is one of my most genius ideas to date. Not genius in a MENSA kind of way, but ye gads its ruddy bloomin' scrummy.
I'll be honest and say the strawberry curd is a wee bit of arsing around, but I promise its so very worth it that it could be sponsered by Loreal.
The second recipe is for a sweet onion tart adapted from an ancient recipe I picked up in Waitrose when I was at uni in Sheffield.
Tarts and quiches with a bit of salad are so nice this time of year around the end of summer and unless your Mrs or Mr Cast Iron Guts you'll never eat a whole tart all at once, so you can pop it in your lunchbox or have it warm for your tea the next day. Economic, no? George Osbourne could learn a thing or two from me.Fact.


 Ingredients
  • Nice big wedge of butter (around 25g)
  • 2 Large red onions
  • 1 Large white onion
  • 200g Dietary Specials Shortcrust Pastry (take out a few hours in advance to defrost)
  • 330ml Creme fraiche (go lite if your counting the cals)
  • 3 Eggs (I use free-range)
  • Generous pinch of nutmeg
  • 15-20g Chives
  • 150 Cheese (Emmental is ideal, but a mild Cheddar works just as well)
 Extras
  • Quiche or flan tin
  • Rolling pin
  • Small sprinkle of plain flour for dusting
  • Baking beans or something to weigh down the parchment during blind baking
Method
  • Throw the butter to melt in a nice big frying pan. Get a sharp knife (mind fingers!) and chop the white onion up finely, then slice the red onions up thinly. Pop the lot in the pan and cook gently over a low heat for around 30-40mins. Give them a stir every now and then. 
  • When the onions are soft and starting to go all lovely and caramelised take the pan off the heat and set it aside to cool.
  • Whack your oven up to gas 5. Lightly dust your work surface with flour and roll out your pastry and use to line your tart tin. Use a bit of parchment to line the pastry and pop in a few baking beans or some rice and blind bake for 10mins.
  • Take the tin from the oven and take out the parchment and baking beans and pop the back in the oven for 5minutes, it should colour slightly.
  • Get yourself a big ol' bowl and pop in the creme fraiche, eggs and the pinch of nutmeg. Use a pair of scissors snip the chives into the bowl, season everything with salt and pepper and spoon in the cooked onions and around half of the cheese. Make sure everything is mixed thoroughly and pour the lot into the pastry case and scatter over the rest of the cheese.
  • Return the filled pastry case to the oven and bake until golden and set and the mixture no longer has a wobble. Remove from the oven and leave to cool for 5minutes before you eat it or tuck in when its cold. Grab a fork, a glass of Chablis and tuck in.Yummers.


   Ingredients
  • 250g Strawberries
  • 150g Caster sugar
  • 2 Eggs and 2 egg whites (I use free-range)
  • 60g Butter
  • 200g Dietary Specials Shortcrust Pastry (take out of the freezer in time to defrost)
    Extras
  • Electric whisk
  • Tart/flan tin
  • Baking parchment
  • Baking beans or rice/lentils
  • Rolling pin
     Method
  • Crank your oven up to gas 5. Lightly flour your worktop and get to work kneading the pastry for a few minutes and then roll out using a floured rolling pin. Line a tart/flan tin with the pastry and then line the pastry with some baking parchment and throw in the baking beans or rice.
  • Pop the pastry in the oven. After around 10mins take it out and remove the parchment and beans and return it to the oven for another 5-7mins. It should be slightly browned but not drastically different in colour. Leave somewhere to cool while you get on with the curd.
  • Lop your strawberries tops off and halve them, popping them in a decent sized pan with a few tbsp's of cold water over a medium heat.
  • Keep the pan at a simmer for 5minutes or until your strawb's are soft. Transfer the strawb's from the pan into a sieve over a clean bowl (must be heatproof) using a slotted spoon. 
  • Get yourself a metal spoon and push your strawb's through the sieve. Add the pulp to the strained strawb syrup left in the pan. 
  • Next you need to make yourself a Bain-Marie which is a beyond preposterous way of saying 'bowl over pan of water'. You will need a bowl that fits into your pan without touching the cm or two of water that's in the bottom. 
  • Bring the water to a simmer over a medium heat and add 50g of sugar, the eggs (beaten before hand) and butter to the bowl and give it all a proper good stir and keep stirring gently and continuously for about 10minutes.
  • Crank the heat up and keeping stirring for another 8-10minutes.Stirring, I know, can get beyond boring...don't be tempted to stop because it will curdle and then you'll be so vexed you'll throw the lot at the wall.
  • When the mixture starts to thicken, take off the heat and pour immediately into the pastry case and set aside while you make the meringue.
  • Get yourself an OCD clean bowl and make sure your whisk is spanking clean too (any grease etc will stop the meringue from rising, and if you stopped stirring when I told you not to with the curd, your already going to be cross without flat meringues).
  • Separate your remaining eggs and plop the whites into the bowl. Using an electric whisk (or a hand whisk if your a martyr to the cause) beat the eggs whites on a medium speed until stiff and foamy. 
  • Add a tbsp at a time of the remaining 100g of sugar and continue to whisk it all until the meringue is very stiff, white and glossy. You can  risk it for a biscuit and try the old 'bowl over the head' trick if you want, but if its forming peaks I'd pass on the biscuit risking!
  • Spoon the meringue over the curd in the pastry case, make sure you can't see any of the curd.
  • Pop back in the oven for 8-10minutes, the meringue should be slightly golden on top. Leave for a few minutes to cool before eating, or gobble it down directly from the oven and burn your entire digestive tract. Claim ownership over this recipe when people tell you how tummy gurgling awesome it is...I'll let you just this one time.

Wednesday, 27 July 2011

Ludicrously Lovely Lemon Syrup Cake


We all know by now that I am a total lemon slut. I love anything with/near/like lemon and as a result I perhaps post more lemon recipes than any other. I had promised that I wouldn't do anymore lemon containing recipes for a while, but after I converted this one from the The Hummingbird Bakery book I knew it was far too yummy not to post it on here (despite it being a doppelganger of one I posted last year) 
The original recipe contains poppy seeds, but since I neither like poppy seeds nor had any in my house at the time the recipe is without them, but if you fancy popping them in I'll give the measurements for them. 
Handily my mother had squirreled away a bagel shaped baking tin which the recipe uses but feel free to use any shaped tin of the same dimensions. I often get asked what products I use so in the brackets are the types of ingredients and the brands that I use (where applicable).

Ingredients
  • 90g Butter (take it out the fridge 10minutes before you start baking to let it soften)
  • 250g Caster sugar
  • 3 Large egg whites (Free Range)
  • 170ml Milk-whole or semi skimmed
  • Grated zest of two small lemons
  • 240g Plain Flour (Doves Farm)
  • 2 Tsp's Gluten-free baking powder  (Dr Oetkar)
  • 1/2 Tsp Xanthan gum (Doves Farm)
  • 1/2 Table salt
  • 20g Poppy seeds if you choose to add them
Lemon Syrup
  • Zest and juice of one large lemon
  • 50g Caster Sugar
I used a lemon glaze but if the thought of all that sugar is setting your teeth on edge rest assured the lemon syrup is plenty to keep the sponge from drying out. Below are the amounts for the glaze.

Lemon Glaze
  • Juice from one large lemon
  • 250g Icing sugar
Extras
  • Ring mould (24cm) or the equivalent
  • Food mixer
  • Whisk (hand or electric)
  • Saucepan
Method
  • Pop the oven on at Gas mark 3 and get down to greasing and flouring your baking tin. It's far too much of a ball ache to line with baking parchment especially if your using a ring tin.
  • In you food mixer throw in the butter, sugar, lemon zest and the poppy seeds if your including them. Give it all a big whizz together until its well mixed.
  • Add the milk a wee bit at a time with the mixer still running, until the whole lot is well mixed. At this point it may slightly split, but don't panic this will be remedied soon.
  • In a large bowl sift in your flour, baking powder, xanthan gum and salt and give it all a big stir.
  • Next add the flour mix into the butter, add a few heaped tablespoons at a time, making sure its all well mixed and combined. Keep mixing until the mixture goes from split to fluffy. (Told you not to panic!)
  • In another bowl separate your egg whites and if your pathetic like me whisk with an electric whisk, if your made of hardier stuff have a go with a hand whisk. You need the whites to be stiff peaks and shiny.
  • Stiffened and peaked, spoon the whites into the cake mix (I like to tip the cake mix into a separate bowl or the paddle gets in the way and hinders the white folding process) and fold them into the mixture, you don't want to fanny around to much folding them in but don't overdo it either because you don't want the mixture over mixed.
  • Pour or spoon the combined mixture into your tin, give the sides of the tin a bang with the heel of your hand and this should level out the mixture. 
  • Pop it in the oven for around 30-40 minutes.
  • While the sponge is baking away you can get on with other things like making the glaze and syrup. 
  • First the syrup. Put all the syrup ingredients into a small saucepan with 100ml's of water and over a low heat bring to the boil. Your looking to reduce the mixture by half, so once its reached boiling point turn the heat up a bit more. Your aiming for a thin syrup consistency, (too thick and it won't pour well). Set aside until the cake is baked.
  • The sponge will rise but will stay pale maybe going slightly golden on top. Use the poke test and insert a knife or skewer in, if it comes away clean your good to go, with mixture on, it needs a few more minutes. The sponge should be firm and bounce back when you prod it.
  • Leaving the sponge in the tin for a moment, pour the syrup all over the top of the cake. Leave the cake to cool for a few minutes or so and then turn it out onto a cooling rack to cool completely. Or at least until you won't risk third degree burns to your throat eating it.
  • To distract yourself from the maddening smell and to resist diving head first into the cake get on with making the glaze.
  • In a small bowl mix the icing sugar and lemon juice until its lump free, smooth and pourable. If you find it's too thick to pour add a little bit of water, if it's too thin add more icing sugar, you know the drill. 
  • Cool and ready for glazing, pop the cake on a stand or plate and drizzle with the glaze. You can throw a few poppy seeds over it for decoration at this point if you fancy.
  • Of a generous nature? Cut into slices and serve to friends and family. Greedy? Run for the hills with your lemon delight and don't look back. I said don't look back!

    Sunday, 19 June 2011

    Oopsy Daisy Upside Down Apple Cake

    After you've finished yakking after reading my vom worthy 'Daddy Cool' post I thought you might like to indulge in a yummy-o, calorific Apple Upside Down Cake (the point being you turn the cake upside down,not eat it whilst upside down...but you knew that already).
    I wouldn't have ever attempted an upside down anything due to my innate ability to pretty much drop anything I pick up, but my Dad found it while flicking though my new Rachel Allen cook book (a barginlicious £5 from W H Smith) and I had promised him a dessert of his choice for Fathers Day and this was what he chose, and blow me if it didn't actually come out pretty much perfectly! I refuse to revel silently in my success since nothing ever really goes exactly how I want it when I make it!

    Ingredients
    • 3 Eating apples (I used Pink Ladies,cos I like the name and the stickers on them)
    • 250g Light brown sugar (you could use caster sugar but the darker sugar works well with the apple and the cinnamon)
    • 50g Butter
    • 200g Plain Flour (Doves Farm as per usual)
    • 2 Large eggs
    • 3 fl oz Sunflower Oil (veg oil would also do,but not olive oil-too strong in taste)
    • 1 tsp G/F baking powder (I use Dr Oetker)
    • 1/2 Salt
    • A generous pinch of bicarbonate of soda (Dr Oekter again)
    • A nice big heaped tsp pf cinnamon
    • 7 fl oz Buttermilk
    Extras
    • You can make this in a largish oven proof frying pan (around 10inches across) or you can use a Pyrex dish as I did. (I'll give instructions for both methods)
    • Sieve
    Method
    • Whack your oven up to Gas 4.
    • While the oven warms you can get on with melting your butter over a gentle heat in a frying pan. Once its melted add in half the sugar giving it a good old stir and cook the mixture of a low heat for around 2-3 minutes. Keep the heat low to avoid burning the sugar. Burnt sugar on a pan is a pain in the arse to get off.
    • Slice your apples to a decent thickness and add into the pan. If your cooking your cake in your frying pan, set to the side while you get on with making your cake mix. If your using a dish spoon the toffee/apple mix evenly over the bottom of your dish and set aside.
    • Sieve your flour, baking powder, bicarb, cinnamon and salt together into a big bowl and give it a quick stir. 
    • In a separate bowl crack in your eggs and whisk with a fork. Add in the buttermilk, the rest of the sugar and the oil, giving it all a proper good stir to combine.
    • Pour the egg/buttermilk mix in with your dry ingredients, give it some welly and stir until you have a smooth cake mix. Don't worry if there's a lump or two here and there. Raymond Blanc isn't coming to tea.
    • Pour the cake mix over the apples (whether in a pan or dish) and pop your pan/dish in the oven for around 30minutes or until the cake has turned golden and is firm to touch.
    • When it's cooked, take the cake out of the oven and leave to cool. As it cools it will start to come away from the sides of the dish/pan.
    • Now for the utterly terrifying bit. Find yourself a big plate and place (face down) over the frying pan/dish and flip the pan/dish and plate over quickly and in one motion if possible. If the cake doesn't quite come away, leave the dish upside over the plate, it will start to suction away after a few seconds.
    • If like my Dad and I you can't wait and are willing to risk third degree burns to your gullet tuck in. It's also yummy a bit cooler with a drop of cream (I don't even know why I said that since I hate cream on puddings). 
    • Take to Twitter and tell the world you have successfully completed an upside down cake.Back of the net.

      Friday, 6 May 2011

      Sublime Scones


      Scones are one of those things that are hard enough to get right when they're not gluten-free, and they're even harder to re-produce when you take gluten out of the mix (literally). This recipe is one that I've adapted from a Phil Vickery recipe. Phil uses his own flour mixes, but I find the Doves Farm flour mixes are brilliant and work great for this recipe.

      Ingredients
      • 300g Self raising gluten-free flour (we need to give these bad boys a fair chance at rising!)
      • 4 Tsp's baking powder (check that it's gluten-free)
      • 25g Caster sugar
      • 2 Tsp's xanthan gum (I use Doves Farm)
      • 100g Butter at room temperature plus extra for greasing
      • 2 Eggs plus another egg beaten to glaze your scone tops (optional)
      • 120ml Milk
      • Pinch of salt
      Makes 12-14

      Extras
      • Baking tray
      • Something to cut your scones out with, a tumbler will do if you don't have a proper cutter.
      • Brush to glaze your scones with
      • Rolling pin
      Method
      • Pop your oven on high to gas 7. Get on with greasing your baking tray, you can either use butter or a little bit on sunflower oil.
      • Get yourself a nice big bowl and sift your flour in. Add the baking powder, sugar and xanthan gum and give it all a good stir with a wooden spoon. 
      • Cube the butter into the flour mix and rub in lightly with your fingers and then make a well in the centre of the mixture.
      • In a jug or small bowl whisk the eggs and milk together and then pour into the well you've made and mix everything together to make a nice soft slightly sticky dough. 
      • Sprinkle some plain flour onto a clean surface and plop the dough onto it. Using your rolling pin lightly roll out the dough until its about 2cm's thick.
      • Using your cutter, cut out your rounds and evenly space them on the greased baking trays.
      • Brush your beaten egg over the tops of your scones and pop in the oven for around 10-15minutes. They should go a nice golden colour on top and be very firm to the touch.
      • Take your scones out of the oven and let them cool down for a few minutes before transferring them to a cooling rack.
      • Dig out your jam and clotted cream and get spreading. on a diet? Use a little low fat cream cheese instead of clotted cream, with a dot of jam you won't even notice the difference.


        Monday, 11 April 2011

        Cheeky Cranberry and Cream Cheese Muffins

        Ingredients
        • 100g Cream cheese (Philadelphia)
        • 200g Plus x2 25g caster sugar 
        • 175g Cranberries (I used frozen cranberries defrosted )
        • 1 Tsp vanilla extract
        • 2 Eggs
        • 2 1/2fl Sunflower oil (don't be tempted to use olive oil,it will make the muffins taste vile!)
        • 200g Plain flour (Doves Farm,Glutafin)
        • 2 Tsps Gluten-Free Baking Powder
        Makes 12


        Extras
        • 12 Muffins cases
        • 12 Hole muffin tray
        • Small pan
        Method
        • Pop the oven up to Gas mark 5 and get on with beating 25g of sugar into a bowl with the cream cheese, mix well until its all combined and whack it in the fridge until you need it later.
        • Throw the cranberries and another 25g of caster sugar into a small pan over a low heat. Warm the cranberries through until they start to pop and the sugar has dissolved. Take it off the heat and give them a little mash up with the back of a wooden spoon.
        • Get yourself a big bowl and sift in the flour,baking powder and the 200g of sugar and a tiny pinch of salt and give it all a quick stir. 
        • Crack in the eggs, pour in the oil and add the vanilla extract along with the mashed cranberries and give it a big old stir until everything is combined and well mixed. It won't be smooth like a normal muffin/cake mix because of the cranberries so don't panic.
        • Spoon the mixture into the muffin cases and dollop a spoonful of the cream cheese mix in the middle of the cranberry muffin mix.
        • Pop in the oven for 25minutes, they should be golden and lovely and slightly oozing on the top where the cream cheese is. Leave to cool, sit back and prepare to be popular!

        Wednesday, 6 April 2011

        Lovely Lemon Macarons (Are you on Team Macaron?)


         So here we go a lovely gluten free macaroon recipe you can get your teeth into. Make sure you make these on a day when you have no appointments/things to do/people to see/sleep to be had. The times I've had to ring up and cancel appointments because my macaron's aren't ready..
        The original recipe is gluten-free anyway, but I couldn't resist twiddling with the recipe and changing the lemon curd around so I could use my own recipe for it.

          
        Ingredients
        • 2 Large eggs (I always use free range, chickens have feelings to y'know)
        • 60g Ground almonds
        • 110g Confectioners sugar  (icing sugar to you and me)
        • 20g Superfine white sugar
        • 1 Tbsp of lemon juice
        • Yellow food colouring (optional)
        For the lemon curd
        • 50g Butter
        • 1 Large egg
        • 2 Heaped tbsp of cornflour or potato flour
        • Zest and juice of a nice big chunky lemon
        • 50g Caster sugar
        Extras
        • Saucepan
        • Piping bag and nozzles
        • Hand whisk
        Method
        • Make your lemon curd first then you can let it cool and forget about it until you need it later. Whisk the egg in a small pan, add the rest of the ingredients and whisk over a medium heat for about 3-4 minutes until the mixture starts to thicken. When it reaches this stage turn the heat down to the lowest heat and simmer for about a minute. Take off the heat and let it cool and then pop in the fridge.
        • Pop the oven up to gas mark 5. You need to finely grind your almonds and icing sugar together, so whack them in a blender together and whizz up until the mixture is fine enough to strain. Next strain over a baking tray lined with parchment and cook for 5-7 minutes and take it out to cool.
        • Separate your eggs and plop the whites in a big bowl and whisk into peaks with your hand whisk or by hand if your Iron Man. 
        • Gradually add the superfine sugar a bit at a time whilst still whisking on a fairly fast speed. At this stage you can add your lemon juice and your food colouring if you want to add it, it just makes the mixture nice and yellow and lemony looking.Obviously.
        • Fold your cooled almond and sugar mixture into the egg white mix until nicely combined.
        • Spoon the mixture into your icing bag (you'll need a fairly wide nozzle, big enough to make small(ish) circles). Pipe your macarons mix onto a baking sheet with fresh parchment and let it stand for an hour somewhere nice and dry away from tiny hands, nosey boyfriends and clumsy cats, until the macarons have started to form a crust on the tops.
        • Pop in the oven for 10-12minutes. Once cooked let them cool and then gently (and I mean gently because after all this faffing your going to scream the house down if you break them by being a clumsy oaf) remove them from the tray and leave to cool completely on a baking tray.
        • Next you can sandwich the macarons together with the lemon curd you made about 36 hours ago.  Spread the curd carefully over a macaroon and sandwich another on top. Pop them in the fridge for another hour before you dish them out to family and friends. Cupcakes not looking so bad now, huh?

        Team Cupcake


        So. The new kid on the block is the Macaron. This year will be the year the Macaron will trounce the Cupcake and blow the Whoopie out of the water.
        Apparently.
        They are defiantly what I'd call the 'posh gals cupcake'. While they're pretty and all that jazz I'm not entirely sure (OK, pretty much certain) that they will ever replace Cupcakes in my affections, plus having made them myself I can honestly say that in terms of taste they ain't got nothing on the humble Cupcake.
        To me the Cupcake is like Jennifer Aniston..reliable, lovely and likeable..the girl next door of baked goods. Then theres the Macaron. The Macaron is like Angelina Jolie..an overated puff of air.
        In the case of the Cupcake Vs Macaron, I would argue that not only is the cupcake an easy bake but its always a crowd pleaser, and while a Macaron looks pretty on a plate it's nothing short of a ball ache to make (oooo that rhymes!).
        I know, I know, the cupcake is more overexposed that Katie Prices love life (almost) but theres something so simple, so yummy and so comforting about the beloved cupcake (I just a searched for team cupcake t-shirts and found loads..as if I'd actually wear one..I so would).
        Anyway.
        Obviously I would in no way want to influence your opinion in this matter one way or another (cupcake, cupcake, cupcake, cupcake, cupcake) so today's recipe is for macarons. Exciting,no?
        So you can all decide for yourselves which is better. While your doing that I'll just be over here...stuffing my face with cupcakes...

        Sunday, 13 March 2011

        "I'm ready for my close up Mr De Mille"

        Alright my lovers?
        I have yet again been in another Other Bowel Problem's induced blogging hiatus. With all the appointments, procedures, medications and jabs I've been feeling rather uninspired and 'A Girl's Guide..' has suffered considerably as a result. So, many apologies and air kisses for the absence.
        Nothing particularly exciting has happened since the last time I posted, apart from my turning 26. Luckily I look like a cabbage patch doll and haven't aged a day since the age of 13 so turning 26 is nothing but a number to me since I get asked ID for lottery tickets and can get cheap fare on the bus thanks to my doughy cheeks and woefully ignorant bus drivers in the South. Thank-you for all the birthday messages and tweets I had a lov-er-ly day and was spoilt rotten.
        The day after Valentines day I had to go to hospital for another colonoscopy (which to those not in the know, is a camera on the end of a glorified hose pipe that they put where the sun doesn't shine) so my consultant could have an up close and personal butchers at The Other Bowel Problems.
        So Valentines day was spent drinking bowel prep with is a nice way of saying Super-Duper strength laxative.
        Along with The Tweenies, Westlife and that scary Evian advert with the babies on roller skates, Picolax (the official name for the bowel prep I have) can be categorised under the heading of The Work of the Devil. Although admittedly it wasn't as bad this time round as it has been previously.
        Typically I'm never lucky enough to have a marginally OK Picolax experience and get away with it and I knew my body would compensate me by making it nigh on impossible to get an IV in.  Two nurses tried and then sent in the big guns in the form of Gavin the gastro registrar and even he was flummoxed (poor devil). He fannied about for a while, digging around in my hands and arms like he was looking for The Lost Treasure of Atlantis, pausing every now and then to wipe his brow and sip a Red Bull. Finally he went in the underside of my wrist, which even though I'm not scared of needles or being cannulated made me want to be sick in his lap. As he was poised needle in one hand my wrist gripped in the other, it was all I could do not to leg it out of the endoscopy unit, hospital gown flapping in the wind and my bare bum exposed to all and sundry.
        Thankfully after my cocktail of pethidine and an unspecified sedative (neither shaken nor stirred) I had a fairly good doze only waking up a couple of times as Dr D wove the Kodak Camera From Hell round my colon.
        Moving on.
        Everyone in my household forgot that it was pancake day on Tuesday and when we remembered none of us could muster up the enthusiasm to cook them, so we had our pancake day this morning. A few people have asked me what pancake recipe I use and to be honest in the past I've always used an old recipe from Good Housekeeping with a few of the ingredients tweaked for my G/F purposes. However I found a yummy sounding recipe in Delicious magazine that I wanted to try.
        Now, I believe that you are either a good pancake maker or not, there's no in between. While I consider myself a good pancake maker, I'm not a very good tosser (ahem) I do admire people who have the knack of tossing pancakes but the reality is if I attempted such showmanship I'd end up with red hot oil in my face and 3rd degree burns. I know this recipe is a bit belated,but I think it's good to have a few basic recipes in your arsenal that you can use whatever the occasion.
        Glutafin have invited me Gluten Free World Days in Southampton in June, I've never been to a gluten-free food/trade type show before so I'm quite looking foward to it, I'm also very excited about meeting my pal Becky from D/S at last. Is anyone else going? Let me know, I'd love to meet any and all of my blogging lovelies!
        I'll leave you with a few pics from the past couple of weeks. I've decided to give up on my 365 project and just post pictures in general posts instead of under a separate link. I can never seem to find something different to take a photo of everyday and I more often then not totally forget to take my picture for that day.
        Hope you all had a lovely jubbly weekend!

        The Pain In The Arse IV. 2 seconds after this was taken my Dad got a gob full from a jobsworth nurse who told him off for taking a picture, 'for confidentiality reasons'..its MY hand lady!
        My much hyped new electric blanket.Oh yeah.
        Pretty cupcake notelets.


        The big 2-6.
        My pretty new bed. Thanks Grandad ;) x

        Birthday cake
        Pretty birthday roses from Tasha
        New bedding (H&M home) and pretty Rose garland (Sass&Belle via Amazon).

        Sunday, 12 December 2010

        I ♥ Mince Pie's


        An ability to produce homemade mince pie's is a skill in other people that I greatly admire, and at the start of the year I decided I wanted to be one of these clever people and endeavoured to make my very own mince pies, from scratch, from the pastry to the mincemeat, every last bit of it would be made by my own fair hands. I talked about the hitch I had with the mincemeat, but luckily I found a Gluten-Free mincemeat recipe (god bless Nigella) which I made at the very start of November, and finally this week I decided the time was right to unite mince with pie and bake a batch. Now, while I used my own pastry for the first batch, I wanted to test the Dietary Specials roll out pastry (which is AMAZING by the way and everyone should buy it) so the pictures here are with the ready made pastry. Should you want to make your own pastry click here for the amounts, ingredients and method. I really won't blame you if you want to use the ready made stuff, pastry, especially gluten free pastry is a colossal ball ache, throw in the pressures and tensions of Xmas you might be hitting the mulled wine at 10am.

        Ingredients
        Makes 32 pies
        • Home made or ready made pastry.
        • Jar of home made or shop bought mince meat (if your buying in remember to check the label for gluten)
        • 1-2 Tsp's icing sugar
        • 1-2 Tsp's cinnamon
        • I Egg
        • Round and star or heart cutters
        • 12 Hole cake tray
        Method
        • Whack your oven up high to Gas 7.
        • Lightly dust your work surface and rolling pin with some plain gluten free flour and roll out your pastry, fairly thin but not drastically so, if you can see your boyfriend through it when you hold it up its probably a tad too thin.
        • Cut out 12 rounds with your circular cutter, (I usually use a medium sized tumbler) and then mould gently into the holes of your cupcake tray, don't be too over zealous moulding them in or it will be nigh on impossible trying to take them out once they're cooked.
        • Next spoon around a teaspoon and a half of your mincemeat mix into the pastry rounds you've just moulded.
        • If you want your mince pies to have 'lids' you'll need to cut our a further 12 rounds and 'glue' them into place with some egg wash. If your making heart of star topped mince pies then cut out 12 of whichever your making and gently place them on top of your mincemeat, giving the a brush with your egg wash.
        • Pop in the oven for about 10minutes, I find the ready made pastry doesn't take quite as long as the homemade kind, and will burn quickly if you don't keep an eye on it, so keep checking your pies every now and then.
        • As soon as they're cooked take them out of the oven and then remove the pies from the tray straight away, if you don't they'll carry on cooking in the tray, and burn and go all horrible and bitter and you don't want that now do you?
        • When the pies are cooled sprinkle with a little bit of icing sugar and weeny bit of cinnamon. 
        • Enjoy with an Eggnog while you write your Christmas cards and misspell the same persons name 4 times and have to rewrite the card again. And again.
        Katie-Boo k
         

          Monday, 29 November 2010

          Christmas Spiced Snickerdoodles


          I harked on about Snicker-doodles in yesterdays post, but actually failed to explain what they are. According to Nigella they're sort of like an oven baked doughnut and a cross between a cookie and sponge, they remind me of those massive sweet pretzels with the cinnamon sugar, and everyone knows I'm a slut for cinnamon. They're the sort of thing that could be varied in so many different ways, but for now I'm going to give you the original recipe without any variations. It's a nice Christmas type recipe, and I've already eaten my body weight of the batch I made yesterday, they are defiantly VERY morish, and something which look good without much effort (shame the same thing can't be said for my hair).

          Ingredients
          Makes around 24-32 
          • 1 Egg
          • 1 Tsp vanilla essence or extract (I used essence here)
          • 125g Butter
          • 100g Caster sugar
          • 250g Gluten-free plain flour (Doves Farm, or a multi purpose plain mix)
          • 3/4 Tsp gluten-free baking powder
          • 1/2 Tsp salt 
          • 1/2 Tsp nutmeg (ground)
          For the cinnamon sugar
          • 2 Tbsp caster sugar
          • 1 Tbsp ground cinnamon

           Method
          • Pop your oven on lowish heat, at Gas 4/180c and grease and line a few baking trays.
          • Using a food mixer, whizz up the butter and sugar until its smooth and creamed together. Crack in the egg and add the vanilla and blitz for around 10 seconds.
          • Add in the flour, baking powder, nutmeg and salt and blitz until you have a thick mixture, which shouldn't be runny, but look almost like pastry and which can be handled without falling to bits or crumbling. 
          • Pinch off walnut sized balls and roll them around in your hand to make them smooth and even. 
          • On a dish or plate mix your cinnamon and 2 tbsp's of sugar together. Roll your 'doodles through the cinnamon/sugar mix until they're completely covered and place on your baking trays.
          • Pop in the oven for around 15-20mins, they should have coloured all over and be slightly hard on the outside.
          • Let them cool for a few minutes and then transfer to a cooling rack to finish cooling down. 
          • They'll last around 5 days in a jar or sealed Tupperware, that's if you don't eat them all within 24 hours of baking them...not that I've done that or anything...

          Tuesday, 16 November 2010

          Katie-Boo's Coffee Cupcakes with Latte Frosting


          Ingredients
          Makes 12
          • 125g/5oz Butter (softened) 
          • 125g/5oz Caster sugar
          • 125g/5oz Gluten-Free self raising flour (Doves Farm, Glutafin)
          • 2 Eggs
          • 2 Tsp's instant coffee + a few drops of water
          • 1 Tsp of vanilla essence (or extract, whichever your prefer)
          For the frosting
          • 125g/5oz Full fat cream cheese (lite or half fat versions work just was well)
          • 50g/2oz Softened butter
          • 300g/ 10 1/2oz Icing sugar
          • 1-2 Tsps instant coffee

          Method
          • Pre-heat your oven to Gas 6/200c and line your  tray with your cupcake cases.
          • Whizz the butter and sugar together in your blender (or in a bowl if your working those guns again) until smooth.
          • With the blender running, crack an egg into the sugar/butter mix and keep blending, then add the other. blend until well mixed and smooth. 
          • So your cakes don't have nasty black granules of coffee in them (which are bitter when you bite in to them) you need to make a paste by mixing your instant coffee with a few drops of water until they form a smooth paste. Add to the mixture in the blender with your vanilla and give the whole lot a lovely big mix. 
          • Sift your flour and throw the whole lot into the blender with the rest of your (already blended) mixture and whizz it all until its a smooth, thick, runny paste.
          • Spoon into the cases. It might seem like there is too much mixture to fit in all the cases, but don't worry they wont morph into gigantic cupcakes.
          • Pop in the oven for a 20-25minutes, as always they should spring back to the touch when they're ready. Leave them to cool for a few minutes or so and them pop them onto a wire rack to cool.
          For the Frosting
          • While your cakes are cooling and your children/dad/boyf is licking the cake bowl clean you can get on with making your frosting. Whizz the icing sugar and butter together in a blender until the mixture is well mixed and comes together in a lump. 
          • Add the cream cheese and the instant coffee into the blender and pulse together until everything is smooth and well mixed.
          • When your cupcakes are cool, feel free to ice and decorate as you like. 
          • Enjoy with a mega cup of coffee in your favourite mug whilst trying to flick through a book and trying not to get icing on the pages.

          Make Mine A Large

          There are three things that always bring infinite joy to my life.
          Pajama's.
          Baking.
          And cups of coffee.
          To say I'm reasonable without a cup of coffee would be fair. To say I'm a snappy moody psychopath would probably be more accurate. Coffee is my life blood and has served me well through early mornings, uni deadlines, hangovers, illnesses and many a energy dive.
          However, I'm not one of these people who need twenty cups of coffee a day in order to function and are so jacked up on caffeine you can see their eyeballs shaking. I'm a one-big-cup-will-do kinda gal. I'm sure they must put mood enhancers in the coffee at Starbucks because nothing makes me as happy as a Skinny Caramel Latte, and now that red cups are back for Christmas with it has come my all-time-favourite-coffee, The Eggnog Latte, two cups of which I've enjoyed already since the start of red cups season. If Starbucks were a religion, id be the patron saint, I've never been let down by the coffee and to make life even better they do their own gluten free cakes and sandwiches. This folks, is what heaven looks like.
          Anyway, This post isn't meant to be me waxing lyrical about S-bucks. Hey, I know not everyone likes coffee, some people like tea...I know a girl who doesn't even drink hot drinks (you know who you are you weirdo!) everyone has their poison and mine is coffee. I've got more coffee mugs than the queen has hats.
          I'm very much from the school of thought that coffee can come in any guise as long as its a cup of coffee, because lets face it not everywhere has a Costa or Starbucks or even a decent peculator, some places only survive (god help them) on vending machine coffee. If the need is strong enough its any port in a storm.
          However. There are several instances of coffee cruelty I can't abide, these include cold coffee (if I wanted a frappe I'd have asked for one), De-caff (I can sniff a placebo a mile off), Mocha's (the coffee wusses drink of choice) and the mother of all coffee insults...weak coffee. Ugh. Anaemic coffee is quite frankly an insult.
          Back to the post. I've been making coffee cake and coffee cupcakes for a good few years now, and its always a crowd pleaser, but several weeks back I decided a good coffee cake shake up was in order and had a good scour of all my baking and cook books for some ideas. In the end, I thought of something all by myself (I'm like that sometimes, I'll have a flash of brilliance once a decade), Latte frosting, genius right? I'm sure its been done before somewhere out there, but I tried it using cream cheese and it was a hit, using the cream cheese does make for a sloppier runnier frosting which you can't pipe, but its so sticky and yummy and goes so well with the coffee cake that you won't care its running off the cake and up your sleeve. 

          The heavenly Eggnog Latte

          Just a fraction of my mug collection
          L-R, Starbucks mug which I in no way pilfered, and my uber cute Paperchase mug

          Monday, 11 October 2010

          Glitter, Glue and Cupcakes too.

          Breast Cancer Care Cupcake Topper (handmade by yours truly!)

          Today is the start of a fairly busy week after a somewhat idle weekend. I've once again put off everything that needs doing and tried to force it all into one short week. Fortunately there are some enjoyable excursions as well as some must-go-to appointments so I cant complain too much.
          Despite my weekend of leisure I'm still deeply knackered. Sleep has alluded me for various reasons over the past week and it's all catching up with me as I sit here with a glazed look in my eyes, drooling all over my laptop.
          Sadly there is no recipe for today, but you can expect the usual ramblings from me plus some pictures of my Pink Cupcakes for Breast Cancer Care that turned out quite well despite a disaster with runny icing which resulted in 10 minutes of tantrum throwing.
          Saturday evening was spent watching car crash telly a.k.a The X Factor, and making cupcake toppers. For anyone not up to date with recent baking news, cupcake toppers are basically tiny flags on sticks that you poke in the top of your cupcakes when they're cooked, all the big gun blogs are doing how to's for making your own cupcake toppers, but I thought I'd wing it and make my own, I did them all completely different so my cupcakes will look eclectic and kooky (I hope!) when topped with these bad boys. My cousin enquired if perhaps cupcake toppers were my new business enterprise, to which the answer was unfortunately no. As much as I love faffing around with glue and glitter I don't know that I'd make enough money from sequins on sticks to get a decent wage. Boo! If you want a step-by-step on how to make them I'd be happy to oblige.
          I've popped a few pics up that I took of the toppers so you could have a gander at my handiwork (amateurish though it is!).  In the quest to get more people following I've hatched a cunning plan which involves t-shirts, glitter pens and a few not easily embarrassed family and friends. A while ago I saw a girl in a magazine who got her C.V printed onto a t-shirt and wore it everywhere in the hopes that someone would read it and offer her an interview or job. Remembering her I thought this might work for me, expect that I couldn't fit my entire C.V on a t-shirt even if I wanted too, but I've had a scope online and I could fit a few decent lines of text on a t-shirt (for £5.99 I can get it written in diamante!). I've already talked my dad into wearing one, I've just got to persuade a few more people, I might get them printed but I'm thinking with my semi decent artistic skills I could probably whip something up myself.
          Anyway. Tomorrow I have a fish pie recipe for you, sometime in the next two weeks I have a guest post and some other marvelous bits and bobs that I think you'll like.
          Before I go, just a quick word on commenting. Please don't be afraid to comment on any of the posts and recipes, I love (and fear!)  hearing your comments, although hypocritical this seems as I almost never comment on other peoples blogs. It's always good to get feedback on recipes, good and bad, so get typing folks! Also I want to hear your stories and sojourn's into gluten-free life and tell me your favourite recipes, you can email me or leave a comment. Thrilling as my life is (ahem) it's always interesting to hear other peoples tales, plus I can be subtly nosey without obviously prying into peoples lives!


          How ace are these cupcake boxes? (pack of 2 from sainsburys)


          Wednesday, 6 October 2010

          Pink Cupcakes


          Thankfully I'm already totally in keeping with the Pink Campaign by Breast Cancer Care with my oh-so-pink blog. And here's another oh-so-pink and shamelessly girly Pink Cupcake recipe in honour of breast cancer awareness month. Make as many as you want, hundreds if you got the time and the man power (or woman power, depending on your household demographics). Take them into work,  school, college, uni, your reading circle, anywhere you please and ask everyone to make a donation per cupcake, they look so scrummy no one could possibly refuse and you'll have a tidy sum to send off to Breast Cancer Care, plus everyone will remember you as the pink cupcake extraordinaire, it's win win!
          You can decorate the cupcakes any way you want to, you could use edible glitter, hundreds and thousands, or even in the shape of boobs a la Lisa Lynch. Just make sure they're fab, fun and PINK!
          Send me any pics of your Breast Cancer Awareness Pink Cupcakes or any other charitable baking your doing this month in aid of Breast Cancer Awareness, Id love to feature your pictures on the blog so email them to me at the usual address.
          now for the baking.
          Above are a few pics of some previously made Pink Cupcakes, I'm baking my batch up at the weekend, so I'll post the snaps up on Sunday.


          Ingredients
          I've given the amounts for a big old batch of 24 decent sized cupcakes
          • 250g/9oz Butter
          • 250g/9oz Caster sugar
          • 4 Large eggs (beaten)
          • 1 tsp Vanilla extract
          • 250g/9oz Gluten-free self raising flour (Doves Farm, Glutafin,Dietary Specials)
          • A few drops of pink food colouring (optional)
          For the frosting
          • 160g/5 1/2 oz Butter
          • 500g/18oz Icing sugar
          • 2 tsp Vanilla essence
          • 2-4 Drops of food colouring
          • 3-4 tbsp Milk
          Method
          • Whack the oven right up to gas 6/200c, the cupcakes only need 20minutes in a super hot oven.
          • Line your cupcake trays with some down right delicious cupcake cases, I'm using some super girly pink flowery cases my mum bought for me which I featured in the post Something for the weekend.
          • Using the guns (which are probably very honed by now!) or a mixer, cream the butter and sugar together until smooth.
          • Add the egg a bit at a time, mixing after each addition. Now is the time to plop in your vanilla, and also your food colouring if your adding it.
          • Sift in the flour and give the whole lot a really good mix until the mixture is smooth, well mixed and lump free. 
          • Spoon into the cake cases and pop in the oven for 15-20 minutes. they should be well risen and golden on top, if your unsure whether they're still cooked after 20mins, give them a gentle press (don't go in like a bull in a china shop because all the will in the world isn't going to make the cakes spring back if you've stuck you finger in them). The cakes should spring back to your touch. Still not sure? Poke a skewer in, if its got cake mixture on, pop back in the oven for a few more minutes. If its clean, remove the cakes from the oven.
          • Leave to cool for a few minutes and then transfer to a wire rack to cool down for a while before you ice them.
          • To pass the time while your cupcakes cool mix up your icing. This frosting is best made in a food mixer, its smoother and creamier and saves some serious RSI aggro. Mix the icing sugar and butter together in the mixer until well combined, add the milk, vanilla and food colouring and give it a good whizz up until the whole lot is well mixed and the food colouring has been incorporated through the entire mixture evenly.
          • Ice your cakes and decorate however which way you like making sure yours are the most fabulous pink cupcakes on offer.


          Saturday, 21 August 2010

          Luscious Lemon Curd Victoria Sponge


          For all my fabulous followers! This is a twist of the normal Victoria sponge recipe and has a lemon curd layer between the sponges as well as lemon frosting! The lemon in the cake mix makes the sponge nice and light and moist, and the tartness of the curd balances out the sweetness of the frosting.


          Ingredients 
           
          For the sponge
          • 200g  Caster sugar
          • 200g Soft butter
          • 200g Self raising flour (try Doves Farm and Glutafin)
          • 1/2 Tsp vanilla essence
          • Grated zest of two small lemons
          For the lemon curd
          • 50g Butter
          • 1 Large Egg
          • 2 Heaped tsps of cornflour or potato flour
          • Juice and zest of a large lemon
          • 2oz Caster sugar  
          For the lemon frosting
          • 8og Butter
          • 250g Icing sugar
          • Rind of 1 lemon 
          • A few drops of yellow colouring (optional)
          • 25ml Milk
          Method
          • Pre-heat the oven at gas 5 and grease and flour 2 cake tins. If your the patron saint of baking parchment as I am the thought of not lining the tins will be enough to make you feel sick but after trying the grease and flour method I must say it was pretty good and the sponge didn't stick, so give it a go!
          • For the sponge whizz the butter and sugar in a blender or by hand until fluffy and well mixed.
          • Next add the eggs one by one and mix well, before adding the vanilla essence, lemon rind and then the flour mixing well until all the ingredients are blended and the mixture is smooth.
          • Divide the mixture between the between the 2 tins and bake in the oven for 20-25minutes. Resist the urge to open the oven door before time. The top of the cakes should be golden brown and will pop back if you give them a poke.
          • While your sponge is in the oven you can get on with making the frosting and curd.
          • Whack all the ingredients for the frosting bar the milk into a mixer (or work your gun's and mix in a bowl with a wooden spoon). Pop the milk in last and mix through until the mixture is smooth and lump free. Cover over with cling film and put in the fridge until your sponge is cool and ready to ice.
          • When your sponge is out of the oven and well on its way to cooling you can start making your curd.
          • Whisk the egg in a small pan, add the rest of the ingredients and whisk over a medium heat for about 3-4 minutes until the mixture starts to thicken. When it reaches this stage turn the heat down to the lowest heat and simmer for about a minute. Take off the heat and let it cool for a few minutes, don't let it cool down too much or it wont spread when you come to cover your cake.
          • When your cakes are cool spread the lemon curd over the top of one of the sponges. When the curd has cooled right down you can then spread the frosting over the top and then finally lay the other sponge (carefully!) on the top of the frosting/curd layers. Lastly dust a little icing sugar over the top and keep in cake tin or air tight container until your ready to unveil to your guests!